麦克斯仇
Think different
161
文章
91250
阅读
首页
INDEX
文章
ARTICLE
关于
ABOUT
使用Btrace进行Java监控调试
创建日期:
2020/03/27
修改日期:
2023/10/11
Java
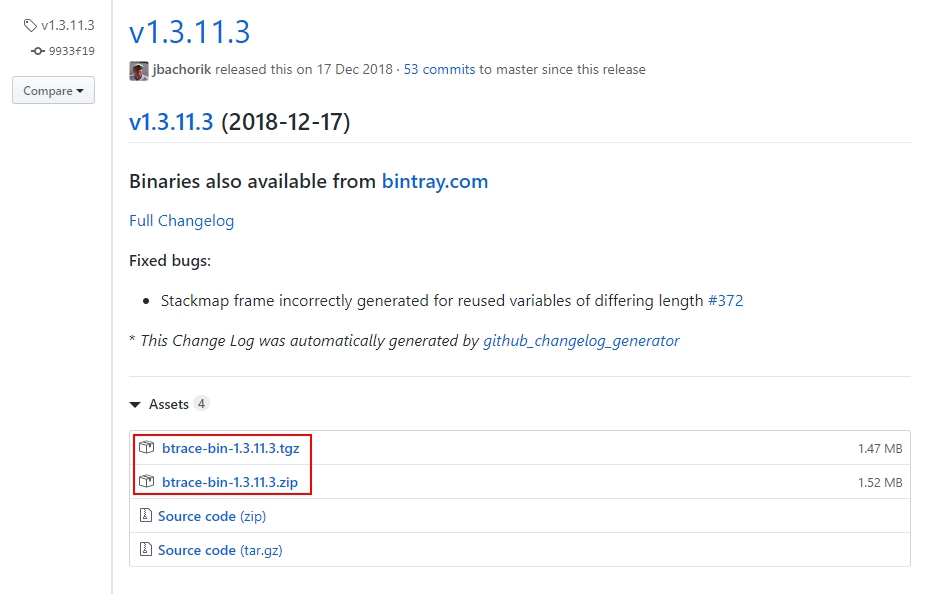
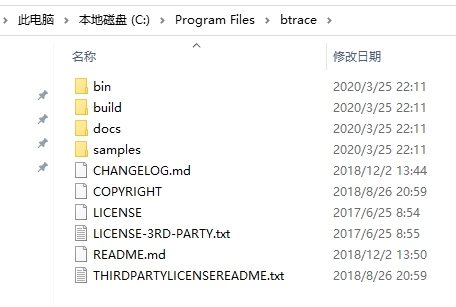
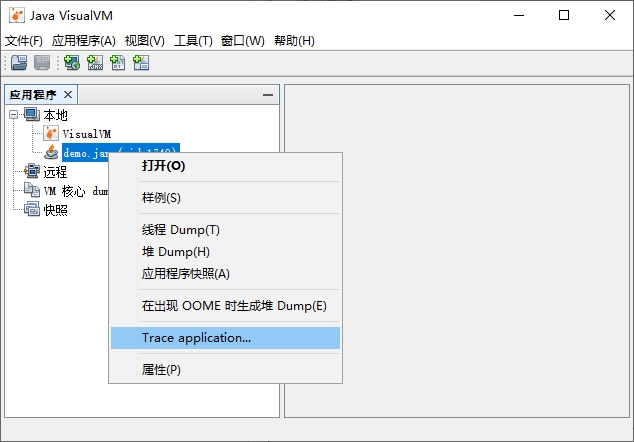
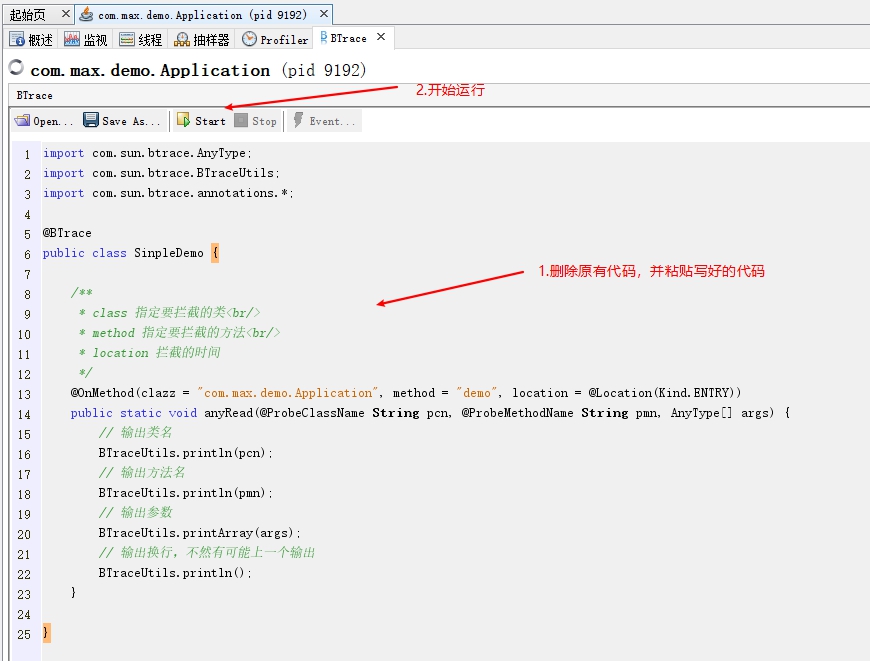
BTrace可以动态的向目标应用程序的字节码注入追踪代码 # 安装 ### 下载 打开GitHub地址:[https://github.com/btraceio/btrace](https://github.com/btraceio/btrace/) 在`Releases`中下载二进制包,建议下载`v1.3.11.3`,`v2.0.0`在下面的示例中不适用  #### Windows 下载`btrace-bin.zip`并解压,解压后放在自定义的目录下 > 以安装在`C:\Program Files\btrace`目录下为例,目录结构如下  添加环境变量 变量名:BTRACE_HOME 变量值:C:\Program Files\btrace\bin Path变量下添加值 %BTRACE_HOME%\bin #### Linux 下载`btrace-bin.tar.gz`并上传到Linux, ```bash # 新建文件夹 mkdir /usr/local/btrace # 解压至此文件夹 tar -zxf btrace-bin.tar.gz -C /usr/local/btrace ``` 解压完成后编辑环境变量文件 ```bash vim /etc/profile ``` 添加如下环境变量 ```bash export BTRACE_HOME=/usr/local/btrace export PATH=$PATH:$BTRACE_HOME/bin ``` 添加后效果如下  # 运行方式 ### 在Java VisulaVM中运行 #### 安装插件 1. 打开`jvisualvm` 2. 打开`工具`---`插件`---`可用插件` 3. 勾选`BTrace Workbench` 4. 点击`安装` 5. 同意协议并安装 #### 运行 在`jvisualvm`界面的运用程序中,右击对应的程序,选择`Trace application`  在编写好程序后,选择`Start` ### 在命令行中执行 ```bash btrace <pid> <trace_script> ``` # 简单示例 ### 使用`Springboot`搭建一个web类型的demo ```java package com.max.demo; import org.springframework.boot.SpringApplication; import org.springframework.boot.autoconfigure.SpringBootApplication; import org.springframework.web.bind.annotation.RequestMapping; import org.springframework.web.bind.annotation.RequestParam; import org.springframework.web.bind.annotation.RestController; @SpringBootApplication @RestController public class Application { public static void main(String[] args) { SpringApplication.run(Application.class, args); } @RequestMapping("/arg1") public String arg1(@RequestParam("name") String name) { return "hello:" + name; } } ``` 运行并浏览器访问`http://127.0.0.1:8080/arg1?name=1`页面显示`1` ### 新建一个Maven工程 依赖中添加如下依赖 ```xml <dependency> <groupId>com.sun.tools.btrace</groupId> <artifactId>btrace-agent</artifactId> <version>1.2.3</version> </dependency> <dependency> <groupId>com.sun.tools.btrace</groupId> <artifactId>btrace-boot</artifactId> <version>1.2.3</version> </dependency> <dependency> <groupId>com.sun.tools.btrace</groupId> <artifactId>btrace-client</artifactId> <version>1.2.3</version> </dependency> ``` 添加如下Java代码 ```java import com.sun.btrace.AnyType; import com.sun.btrace.BTraceUtils; import com.sun.btrace.annotations.*; @BTrace public class PrintArg { @OnMethod(clazz = "com.max.demo.Application", method = "arg1", location = @Location(Kind.ENTRY)) public static void anyRead(@ProbeClassName String pcn, @ProbeMethodName String pmn, AnyType[] args) { BTraceUtils.println(pcn); BTraceUtils.println(pmn); BTraceUtils.printArray(args); BTraceUtils.println(); } } ``` 注解内容 | 说明 ---|--- class | 指定要拦截的类 method | 指定要拦截的方法 location | 拦截的时机 参数 | 说明 ---|--- @ProbeClassName | 类名 @ProbeMethodName | 方法名 AnyType[] | 参数 > 因为`printArray`输出后不换行,所以需要添加一行`println` ### 开始监控 #### 在Java VisulaVM中执行 将编辑好的Java代码粘贴到`jvisualvm`中,并点击`Start`  运行完成后点击`Stop`停止 #### 在命令行中命令 `cmd`进入`PrintArg`所在的路径下,执行以下命令 ```bash # 先查看运行的demo进程 jps # 执行以下命令开启监控 btrace <pid> PrintArg.java ``` 浏览器访问重新`http://127.0.0.1:8080/arg1?name=1`,控制台显示如下内容,说明拦截到了 com.max.demo.Application arg1 [1, ] > 若有时候发现不输出,则再刷新一下浏览器,如果还不输出,则检查代码,比如检查`class`,`method` 运行完成后`Ctrl+c`并按`1`,然后`Y`回车停止 # 完整示例 ### 监控方法 #### 监控普通方法 > 见简单示例 #### 拦截构造方法 在`demo`项目下新建`User`类,并实现无参构造和有参构造 ```java package com.max.demo; public class User { private Integer id; private String name; public Integer getId() { return id; } public void setId(Integer id) { System.out.println("执行了setId"); this.id = id; } public String getName() { return name; } public void setName(String name) { System.out.println("执行了setName"); this.name = name; } public User() { super(); System.out.println("执行了无参构造"); } public User(Integer id, String name) { super(); System.out.println("执行了有参构造"); this.id = id; this.name = name; } } ``` 在`Application`类中新增如下方法 ```java @RequestMapping("/constructor") public String constructor() { User user = new User(); User user1 = new User(1, "23"); return "hello"; } ``` 在`btrace`项目中新建`PrintConstructor`类,如下: > 拦截构造方法时,method使用`<init>`,且无参有参构造均可拦截 ```bash import com.sun.btrace.AnyType; import com.sun.btrace.BTraceUtils; import com.sun.btrace.annotations.BTrace; import com.sun.btrace.annotations.OnMethod; import com.sun.btrace.annotations.ProbeClassName; import com.sun.btrace.annotations.ProbeMethodName; @BTrace public class PrintConstructor { @OnMethod(clazz = "com.max.demo.User", method = "<init>") public static void anyRead(@ProbeClassName String pcn, @ProbeMethodName String pmn, AnyType[] args) { BTraceUtils.println(pcn); BTraceUtils.println(pmn); BTraceUtils.printArray(args); BTraceUtils.println(); } } ``` 重启`demo`项目,之后使用`btrace`进行拦截,访问`http://127.0.0.1:8080/constructor`,控制台输出如下 com.max.demo.User <init> [] com.max.demo.User <init> [1, 23, ] #### 监控重载方法 在`Application`类中新增如下方法 ```java @RequestMapping("/same1") public String same(@RequestParam("name") String name) { return "hello:" + name; } @RequestMapping("/same2") public String same(@RequestParam("name") String name, @RequestParam("id") int id) { return "hello:" + name + "," + id; } ``` 在`btrace`项目中新建`PrintSame`类,如下: ```java import com.sun.btrace.BTraceUtils; import com.sun.btrace.annotations.BTrace; import com.sun.btrace.annotations.OnMethod; import com.sun.btrace.annotations.ProbeClassName; import com.sun.btrace.annotations.ProbeMethodName; @BTrace public class PrintSame { @OnMethod(clazz = "com.max.demo.Application", method = "same") public static void anyRead(@ProbeClassName String pcn, @ProbeMethodName String pmn, String name) { BTraceUtils.println(pcn); BTraceUtils.println(pmn); BTraceUtils.println(name); BTraceUtils.println(); } } ``` > `String name`中,类型`String`相同即可,变量名可以不一样 启动监控后访问`http://127.0.0.1:8080/same1?name=1`,控制台输出如下 com.max.demo.Application same 1 但是访问`http://127.0.0.1:8080/same2?name=1&id=2`,控制台无输出 若需要监控两个参数的方法,则对应的监听器也需要两个相同类型的参数,举例如下 ```java public static void anyRead(@ProbeClassName String pcn, @ProbeMethodName String pmn, String name, int iddddd) { BTraceUtils.println(pcn); BTraceUtils.println(pmn); BTraceUtils.println(name + " " + iddddd); BTraceUtils.println(); } ``` 访问`http://127.0.0.1:8080/same2?name=1&id=2`,控制台输出如下 com.max.demo.Application same 1 2 ### 监控时机 > 根据`location = @Location(Kind.?)`进行设置具体监控时机 #### 监控入口 Kind.ENTRY > location默认值为`Kind.ENTRY` #### 监控返回值 Kind.RETURN 在`btrace`项目中添加`PrintReturn`类,如下 ```java import com.sun.btrace.AnyType; import com.sun.btrace.BTraceUtils; import com.sun.btrace.annotations.*; @BTrace public class PrintReturn { @OnMethod(clazz = "com.max.demo.Application", method = "arg1", location = @Location(Kind.RETURN)) public static void anyRead(@ProbeClassName String pcn, @ProbeMethodName String pmn, @Return AnyType result) { BTraceUtils.println(pcn); BTraceUtils.println(pmn); BTraceUtils.println(result); BTraceUtils.println(); } } ``` > 参数中添加`@Return`注解,代表监控返回值 访问`http://127.0.0.1:8080/constructor`,控制台输出如下 com.max.demo.Application arg1 hello:1 #### 监控异常 Kind.RETURN 在`Application`类中新增如下方法 ```java @RequestMapping("/exception") public String exception() { try { System.out.println("start..."); System.out.println(1 / 0); System.out.println("end..."); } catch (Exception e) { // 捕获异常,但是不抛出 } return "success"; } ``` 重启后浏览器访问`http://127.0.0.1:8080/exception`,发现项目并没有抛出异常信息 在`btrace`项目中新建`PrintOnThrow`类,如下: > 此段代码来自官方[https://github.com/btraceio/btrace/blob/release/1.3.11.3/samples/OnThrow.java](https://github.com/btraceio/btrace/blob/release/1.3.11.3/samples/OnThrow.java) 大概意思就是监控异常的所有构造方法,当有返回时,打印堆栈信息 ```java import com.sun.btrace.BTraceUtils; import com.sun.btrace.annotations.*; @BTrace public class PrintOnThrow { @TLS static Throwable currentException; @OnMethod(clazz = "java.lang.Throwable", method = "<init>") public static void onthrow(@Self Throwable self) { currentException = self; } @OnMethod(clazz = "java.lang.Throwable", method = "<init>") public static void onthrow(@Self Throwable self, String s) { currentException = self; } @OnMethod(clazz = "java.lang.Throwable", method = "<init>") public static void onthrow(@Self Throwable self, String s, Throwable cause) { currentException = self; } @OnMethod(clazz = "java.lang.Throwable", method = "<init>") public static void onthrow(@Self Throwable self, Throwable cause) { currentException = self; } @OnMethod(clazz = "java.lang.Throwable", method = "<init>", location = @Location(Kind.RETURN)) public static void onthrowreturn() { if (currentException != null) { BTraceUtils.Threads.jstack(currentException); BTraceUtils.println("====================="); currentException = null; } } } ``` 启用监控后重新访问`http://127.0.0.1:8080/exception`,控制台输出如下 java.lang.ArithmeticException: / by zero com.max.demo.Application.exception(Application.java:43) sun.reflect.NativeMethodAccessorImpl.invoke0(Native Method) #### 监控行号 在`btrace`项目中新建`PrintLine`类,如下: ```java import com.sun.btrace.BTraceUtils; import com.sun.btrace.annotations.*; @BTrace public class PrintLine { @OnMethod(clazz = "com.max.demo.Application", method = "arg1", location = @Location(value = Kind.LINE, line = 19)) public static void anyRead(@ProbeClassName String pcn, @ProbeMethodName String pmn, int line) { BTraceUtils.println(pcn); BTraceUtils.println(pmn); BTraceUtils.println(line); BTraceUtils.println(); } } ``` 启用监控后重新访问`http://127.0.0.1:8080/arg1?name=1`,控制台输出如下 com.max.demo.Application arg1 19 ### 更多监控示例 1. 在`btrace`安装路径下的`samples`目录 2. GitHub:[https://github.com/btraceio/btrace/tree/release/1.3.11.3/samples](https://github.com/btraceio/btrace/tree/release/1.3.11.3/samples) # 注意事项 1. 默认只能本地运行 2. 生产环境下可以使用,但是被修改的字节码不会被还原
48
全部评论